A DS Upgrade ReviewPost Date: 2014-04-18 |
Post Reply 
|
| Author | |
Costone 
Groupie 

Joined: 28 Jun 2008 Online Status: Offline Posts: 489 |
 Quote Reply Quote Reply
 Topic: A DS Upgrade Review Topic: A DS Upgrade ReviewPosted: 18 Apr 2014 at 9:04am |
|
Mission Accomplished! So finally here’s the continuation of my Digital Storm upgrade review that I posted in the Customer Configuration Forum. I think it’s long enough to take you to punch out time at 5pm...so hope you enjoy the read. 
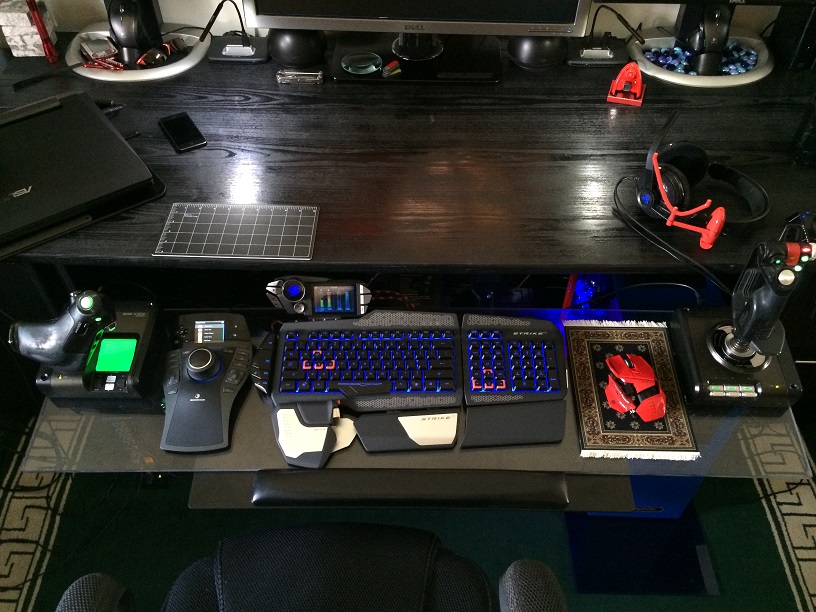
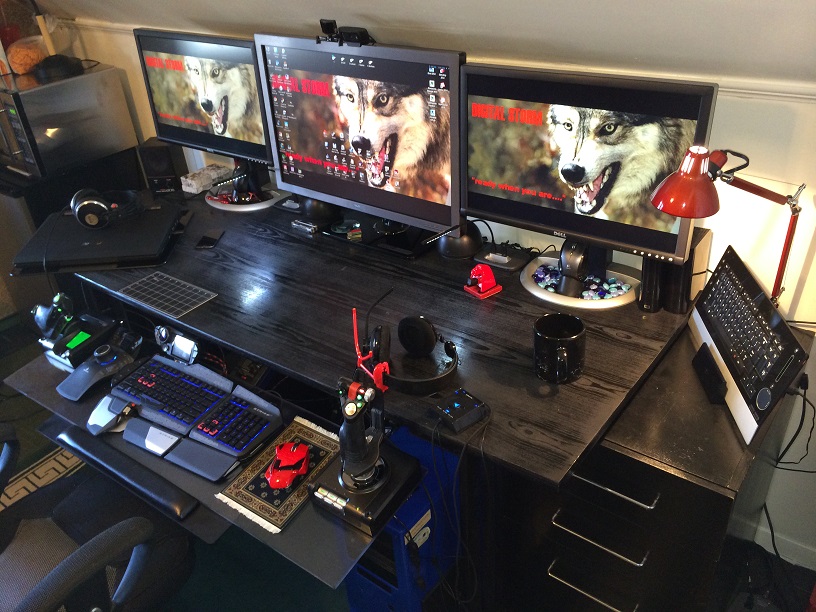
Quick Background: I first purchased Superma... uh, I mean my elite Digital Storm customized dual loop system, in mid-2008 to handle a new triple monitor setup I was planning out. I was an avid flight simmer and a mostly RTS gamer but also highly advanced with using state-of-the-art technology applications as well. I was looking for a more immersive display setup to keep pace with all of my productivity tools. The cutting-edge systems at that time were still about the Yorkfield Quad Core’s and GTX 280’s. It was just a few months prior to the much anticipated launch of the i7 processors we can’t live without today. But after seeing Digital Storm’s spectacular build work and exotic eye candy on display I had zero patience to wait it out...so hell, I ordered. 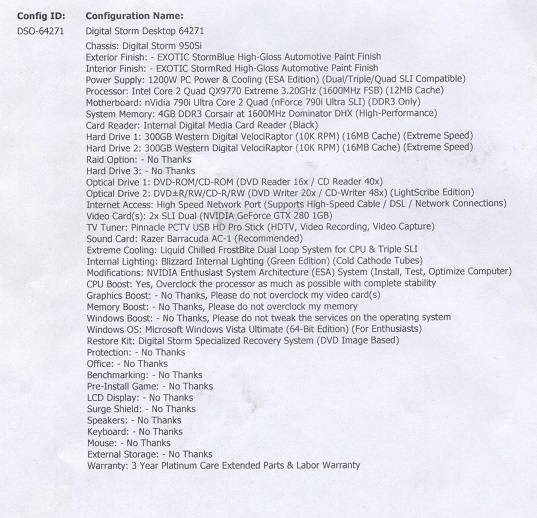
And it arrived in style and took care of all my gaming titles like Michael Corleone on a Sunday. 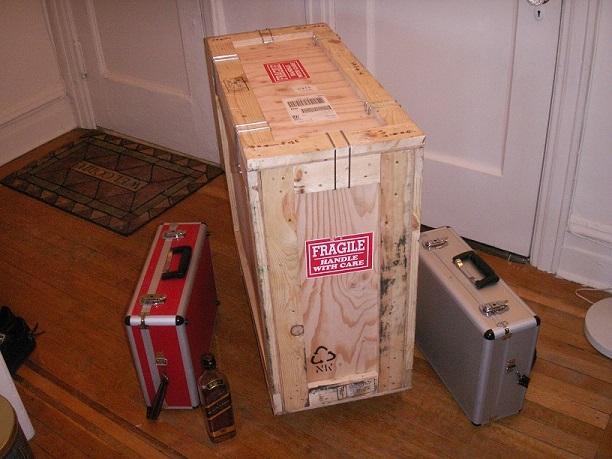
ffwd 6 years of Digital Storm bliss later, year 2014. GPU’s were relentlessly leaping in crunching power and motherboards were dramatically advancing as well. About time for a new tailor and a fitted suit I said. So I priced out a full blown Aventum II with copper. I was actually content with having a spanking new accomplice team up with my legacy DS rig. Then I reassessed how well-built and upgradable the system really was (as intended) and it became clear that it was still a formidable opponent in the ring. So I elected to take it down to the boxing gym for more training instead of retiring it to lesser sparring duties. Thus my upgrade post in the Customer Config section. The build itself took approximately three days (if you include time required to properly flush the dual loop system which consisted of 2 pumps, 2 reservoirs and 3 rads). The first thing I did even before attacking the project was to make a build list or an outline of procedures to follow, which was basically five stages: Dismantling, cleaning, installation, pre-test/burn-in’s and final testing. Dismantling was a fairly smooth process. I began with draining the dual loop system. Before disconnecting all of the old tubing and reservoirs I flushed all three rads with two passes of distilled water and vinegar solution to remove any deposits of debris. With the tubing out of the way I then disco’d and dismantled the three GPU’s in SLI with the intention of reusing the two vid connectors spanning the cards. I then disco’d and removed the old ESA monitoring module and sensor wires from the top bay. That was then followed by the QX9770 motherboard preserving the four 4GB CorDom mem sticks. 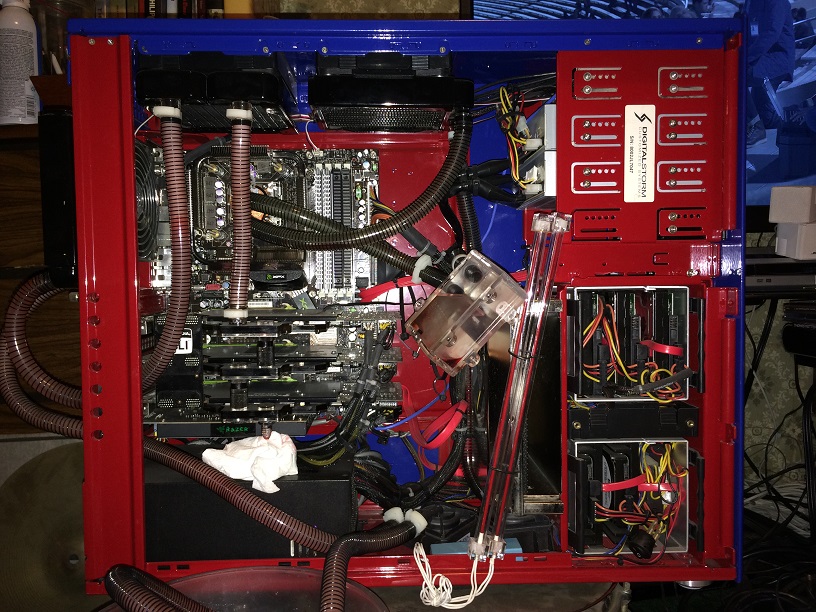
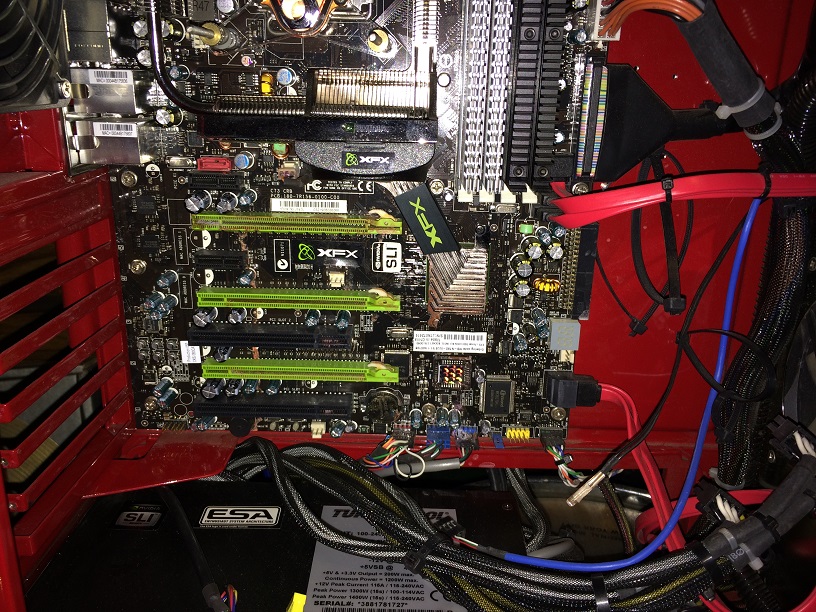
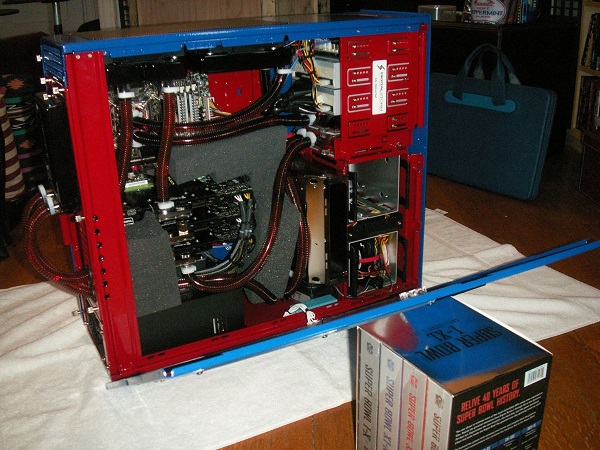
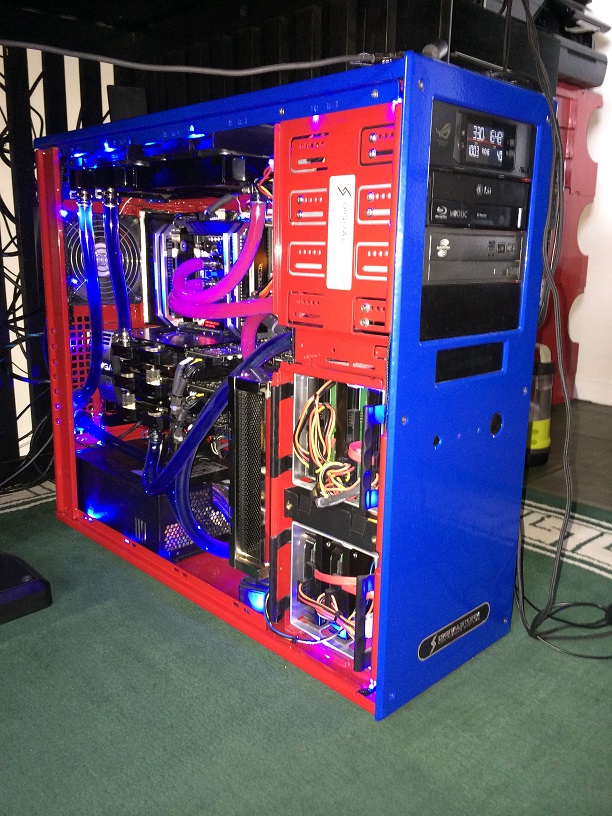
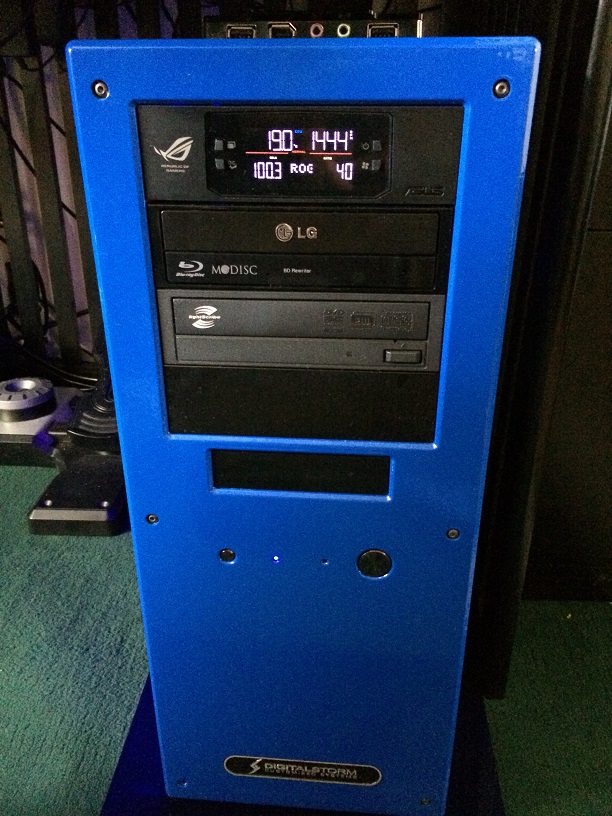
Cleaning was surprisingly light considering that the rig was torching it out for 6 years. Just found some spots of dried up fluid in the corners of the case from previous flushes which came up easily with alcohol. Then it was a thorough dust off with the air can. Installation began with the new ASUS OC unit. I mounted the unit into the supplied 5 ¼” bracket and plugged it into the top bay where the old ESA module sat. I then connected and dangled the PIN cable for connecting to the motherboard later on. The next install item was an afterthought, an upgrade to my DVD-ROM’s which were still IDE versions using 4-pin MOLEX and ribbon connectors. Although their popularity is fading I still decided to upgrade to a new LG BH16NS40 Blu-ray burner just for the option of loading discs during installation more so. I considered a few slim models but I have a ton of bay space at the front panel now. Next up was preparing the ASUS Rampage IV Black Edition motherboard and inserting the 4960X chip. I also attest that the Rampage is really a fantastic looking board all around. I probably spent a half an hour just admiring the piece of build work. Then I set the new Koolance CPU-380I waterblock assembly onto the board which was all but effortless because of the motherboard’s rigid integrated back plate and post assembly. A careful stripe of thermal paste down the chip and it was done in a minute making sure to apply equal turns diagonally on the post screws. The mounting of the MB was also a smooth process. No issues aligning the mounting points onto the panel. The TJ09’s accommodating MB tray was designed to slide out for easy access but since the case was custom painted on the back side I decided not to tamper with damaging the exotic finish. I then connected the ASUS OC panel cable to the board along with all other remaining device cables. Next in were the absolutely beautiful GTX 780 Ti’s. I obviously wanted to verify operability of the cards before cracking them open to waterblock them of course. The first two cards slid into the 3rd and 2nd PCI slots effortlessly but I did find an obstruction with inserting the top GPU into the 1st slot. Apparently the two metal fins on the end of the card were hitting something underneath the thin gap in between the case and the edge of the MB and refused to sit properly into the expansion slot. Rather than damage the MB I chose to snip the ends down by about 1/16” using a pair of metal shears. It worked perfectly and all three cards were ready to test fire after snapping on the 3-way EVGA SLI bridge. These cards looked so good in their cases alone and I was regretting having to waterblock them later on! 
I then inserted the four hefty 8GB sticks of DDR3 Corsair Dominator RAM into the staggered memory slots as required. Good to hear that reassuring snap of the caps to verify that they are sitting securely. The last operation before test firing the system was installing the CPU loop since it was already waterblocked and ready for connection. I uncoiled a 10 ft. pack of PrimoChill 3/8” ID x 5/8” ID clear tubing and meticulously measured out the lengths to cut to the new shelf reservoir, the rad above and the base pump below. It took a few frustrating tries to get exacting reaches to the barbs but a few snips later all tubing was in place with shiny 5/8” clamp fittings all around. I then filled the loop with distilled water first before inserting the Feser One red liquid coolant. I also run new tubing for the GPU loop only to serve and continually flush the rads with distilled water since the cards are not waterblocked yet. 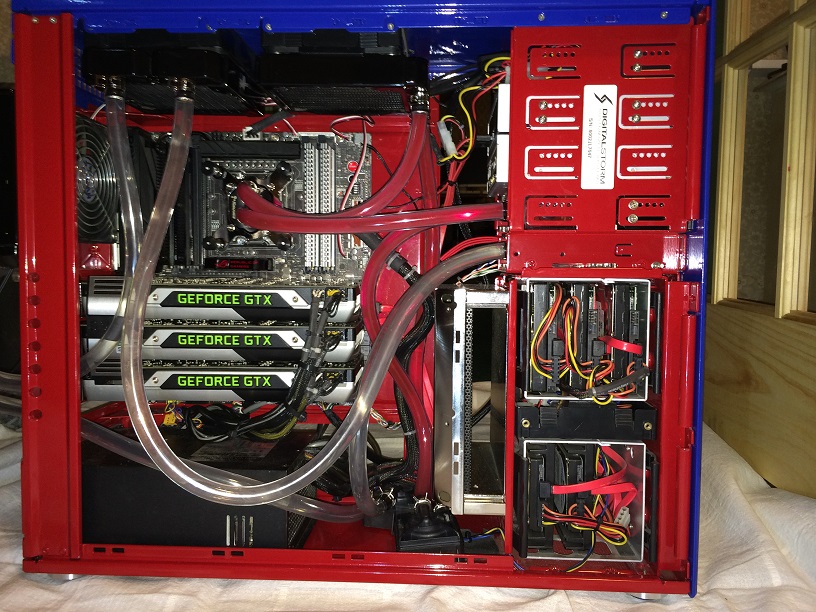
Time to ignite the turbines! Pre-testing. A very nervous moment indeed hitting that glowing red start button on the ASUS MB. I think to myself that I would probably be calmer diffusing a land mine in a sandstorm with all the costly components at stake. So I pucker up, close my eyes and press the START button waiting to see the flash from a thermonuclear detonation. Much to my relief the Rampage lights up and the three 780 Ti’s spin up to speed. I proceed to install Windows 8.1 OS and then download critical drivers and endless tons of my titles and apps. Main thing is that the three GPU’s are all good to go for waterblocking. After a day or so running leak tests on the CPU loop I then drain the distilled water and insert the Feser One red cooling fluid and drop a silver coil into the reservoir for good measure. I also remove the GPU’s to start the meticulous waterblocking procedure. After about three monotonous hours the three waterblocks are successfully completed and ready for mounting. I connect the two old vid connector posts onto the waterblock assembly to reuse them and attempt to insert the cards into the PCI slots. I discover that the cards are not fitting due to the thicker Koolance waterblocks designed for the 780’s. The connectors are spreading the cards too far apart! Bummer. Gotta order adjustable ones and wait. 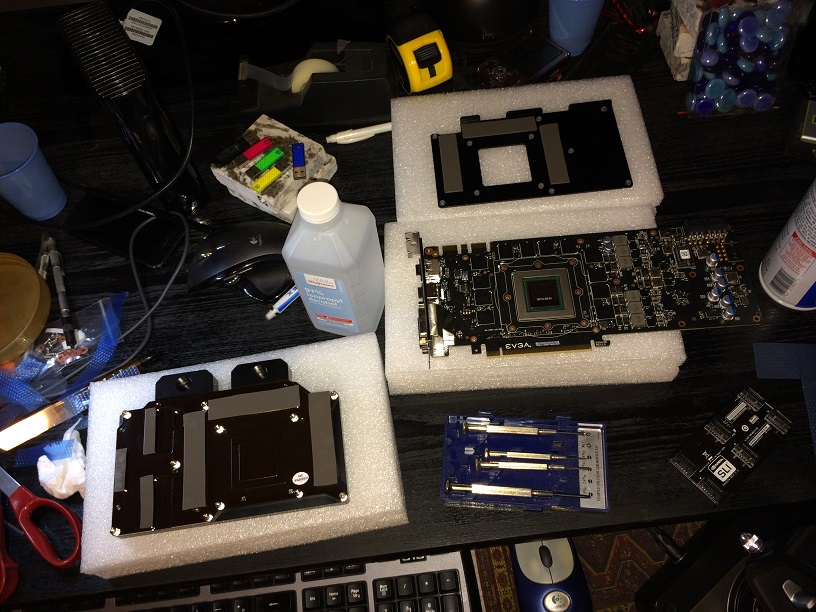
The adjustable vid connectors arrive and I successfully insert the waterblocked GPU assembly. I recut the GPU loop tubing to fit the card assembly and fill it with Feser One blue cooling fluid. 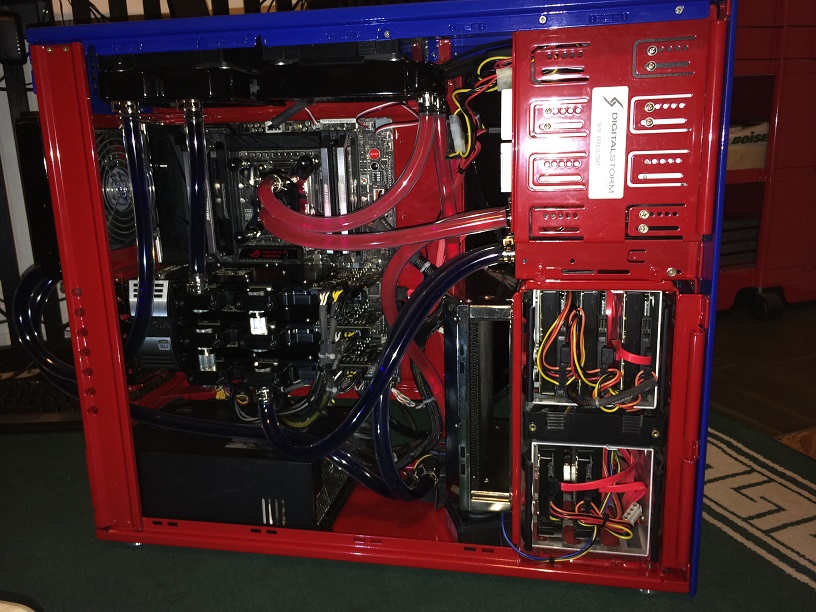
The testing phase is now complete and the rig is officially legit. I look next to enhance the interior case lighting from the installed two-tube Logisys kit in the original build. Now the most difficult decision of the upgrade is debating which LED color to select given the colorful case, red, blue or simple white? I decide on the NZXT CB-LED20-BU blue rope kit and by the looks of it I made a pretty decent decision. 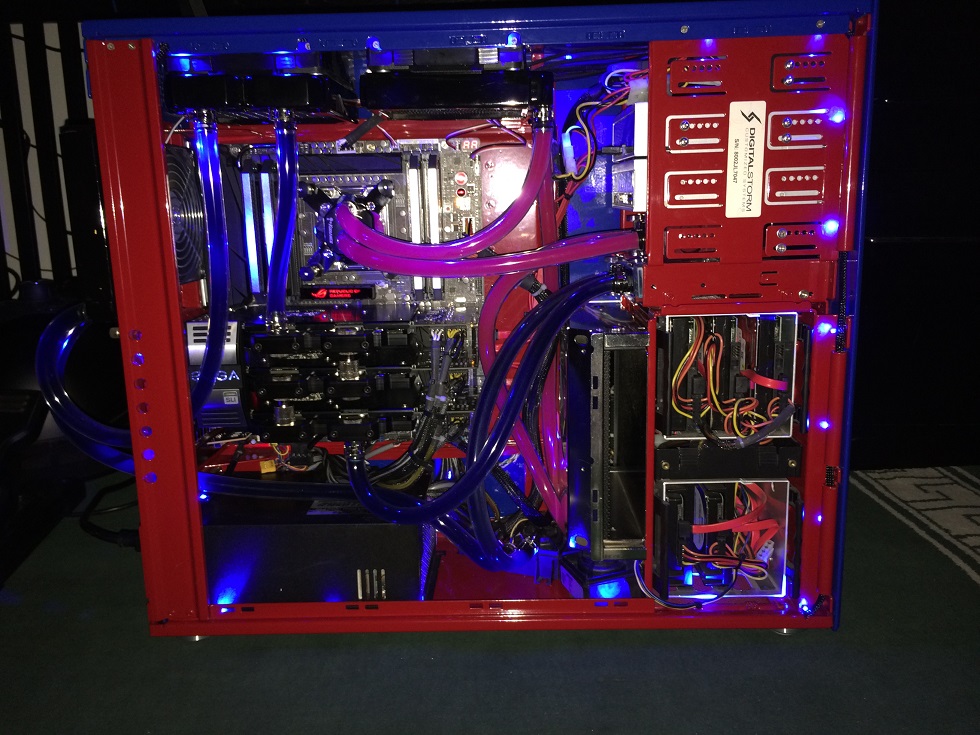

So now upgrade insanity sets in...can’t just stop here. Gotta update the G15 keyboard and mouse too. Oh what better than a Mad Catz S.T.R.I.K.E 7 and R.A.T 9 gaming mouse to take their place. It’s only money...and who needs it! 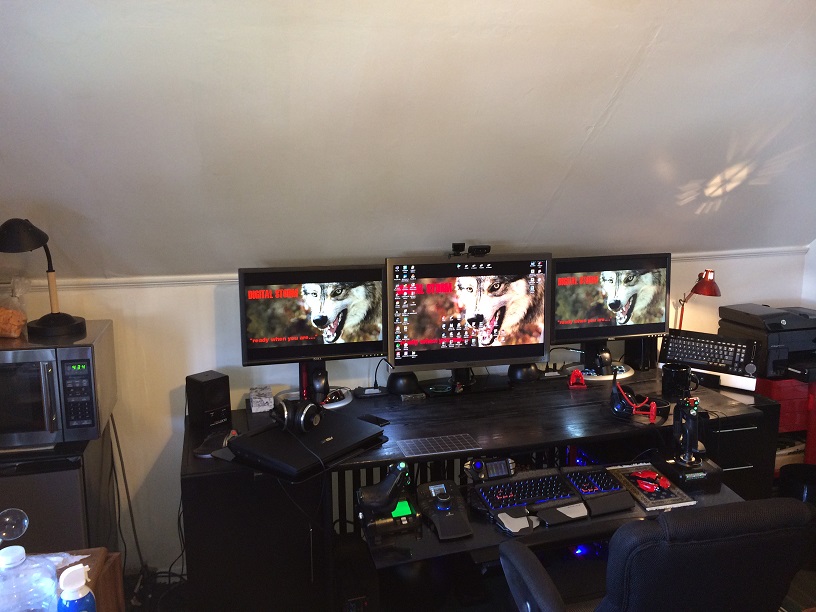
In summary, you look back on the choices you’ve made and where they’ve led you to. I couldn’t be happier with the decision I made to choose Digital Storm for my custom-built system. I have no doubt that I’ll be buying my next one from them as well. I'll post up some performance specs next.  Edited by Costone - 18 Apr 2014 at 10:54am |
|
|
Velox X | ASUS Prime X670-P | AMD Ryzen 9 7950X | 64GB DDR5 5200 | 2TB M.2 Samsung 980 Pro | RTX 4070 Ti | 850W PSU

|
|
 |
|
|
ArkansasWoman777
DS Veteran 
Joined: 19 Aug 2012 Online Status: Offline Posts: 4314 |
Quote Reply
Posted: 18 Apr 2014 at 10:17am |
|
Awesome review

|
|
|
"Captain Sirius Black"
Storm Trooper i5 3570k Ordered: 11-27-12 Stage 1: 11-29-12 Stage 2: 12-2-12 Stage 3: 12-2-12 Stage 4: 12-4-12 Stage 5: 12-4-12 Stage 6: 12-10-12 Stage 7: 12-12-12 |
|
|
|
|
bprat22
DS ELITE 
DigitalStorm East -- (Unofficially!)
Joined: 08 Jun 2011 Online Status: Offline Posts: 20391 |
Quote Reply
Posted: 18 Apr 2014 at 11:15am |
|
Nicely done review.
The pics and write-up were top notch.  Thanks.  |
|
|
|
|
Keenque
Newbie 
Joined: 08 Jan 2014 Online Status: Offline Posts: 70 |
Quote Reply
Posted: 18 Apr 2014 at 1:11pm |
|
ummm....WOW
Not much I can add to that. |
|
|
~ Keen
|
|
|
|
|
Nav
Admin Group 
Digital Storm Employee 
Joined: 15 Jan 2021 Online Status: Offline Posts: 1581 |
Quote Reply
Posted: 18 Apr 2014 at 2:04pm |
|
Nicely done!

|
|
|
|
|
oldlady RPGer
DS Veteran
One of the cool kids
Joined: 09 Sep 2011 Online Status: Offline Posts: 1080 |
Quote Reply
Posted: 19 Apr 2014 at 12:03am |
|
Wow just WOW!!!!!!!! Looks awesome.

|
|
|
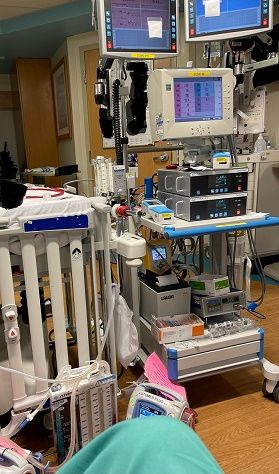
Me sitting my ECMO in PICU. Now you know why I like LC. ;)
|
|
|
|
|
Snaike
Moderator Group
Just a dude trying to keep the spam away
Joined: 23 Jan 2014 Online Status: Offline Posts: 9462 |
Quote Reply
Posted: 19 Apr 2014 at 12:58am |
|
|
|
|
|
|
fstcvc
DS Veteran
Joined: 06 Jul 2013 Online Status: Offline Posts: 2551 |
Quote Reply
Posted: 19 Apr 2014 at 8:40am |

|
|
|
HailStorm II
i7 4770K @ 4.5GHz Asus Maximus VI Extreme 16GB Corsair Dominator Platinum 3xSLI EVGA SuperClocked GTX TITAN Samsung 840Pro SSD 256GB+512GB HydroLux+XSPC CPU/MoBo/GPU Liquid Cooling |
|
|
|
|
Post Reply
|
| Forum Jump | Forum Permissions You cannot post new topics in this forum You cannot reply to topics in this forum You cannot delete your posts in this forum You cannot edit your posts in this forum You cannot create polls in this forum You can vote in polls in this forum |
About Digital Storm
Contact Information
Facility Tour
Financing
Buy Now, Pay Later
Downloads
GSA Schedule
Terms & Conditions
Privacy Policy
Request Help
Call: 1-866-817-8676
(Hours 9AM-5PM PST)
![]()
![]()
![]()
![]()
![]()


 Topic Options